Ubuntu Linux is a wonderful Linux based Operating system and used by most people, but the only disadvantage for the people who are using Ubuntu is that ,they don’t know where the resources that match their requirements exists on Ubuntu, Basically ubuntu has everything we need in it,
Today let us discuss about “How to Instal MySQL in Ubuntu Linux”, with some few easy steps. Ubuntu Have its own software market, from that market we get everything we need easily, the only thing we need s Internet 🙂 ,
- Easy way to install MySQL server in your Ubuntu desktop. Do the following steps:
- In the desktop go to Applications and Select “Ubuntu software center“,
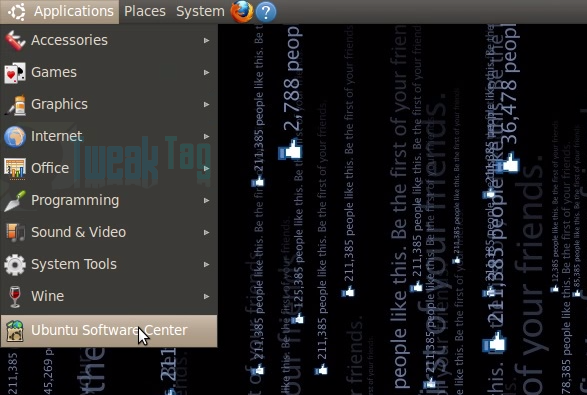
- Type in “mysql” in the search box, that appears in the rightmost corner of the window,
- You will get a list as below, now click on the MySQL Server in the list,
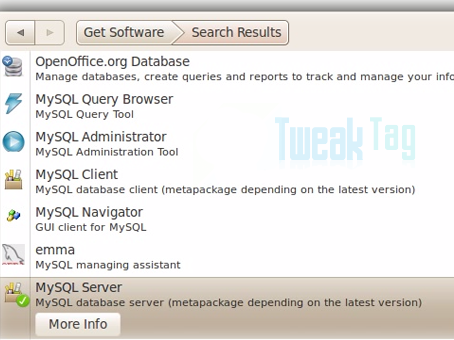
- If you have already installed MySQL Server it will show “Remove” button in the right corner of the selected Software.
- Now Click on “More Info” in the left and you will get the below window,
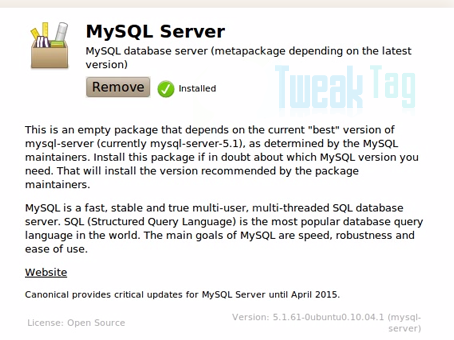
- You will also find the install button in this window instead of “Remove” if you have not yet installed the MySQL Server.
- It will install in minutes and after that you can proceed with coding, you will not have a separate window as you have in Microsoft Windows.
- So after Installing that go to Terminal window by pressing “Ctrl + Alt + T” or go by clicking Applications -> Accessories -> Terminal,
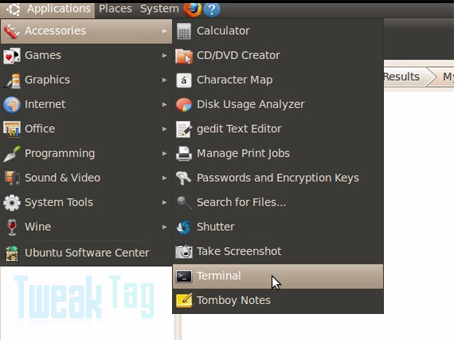
- Now type in the following command as it is shown in the above terminal window:
mysql -u root -p
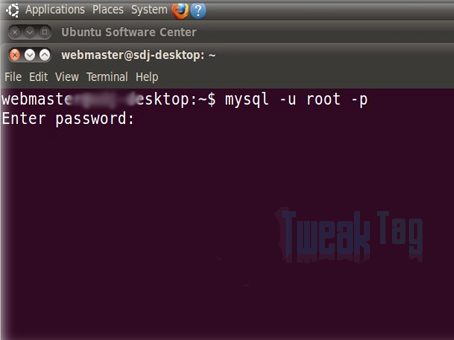
and tap enter. You will be prompted for password. Now you will have to enter the password for the MySQL(by default its “root“).
- And that’s it you have your MySQL server to work,
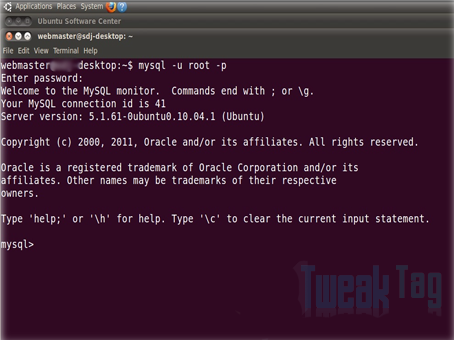
- To quit from the MySQL Server press “Ctrl + C”.
Post your doubts and comments.
Regards,
TweakTag Team

Here you have some good reason’s to switch to ubuntu… Go for this link,
http://www.tipsinside.com/2012/04/why-i-have-to-switch-linux-operating-system/
Nice Info thank you web master… 🙂
Pingback: Installing and using windows applications (exe) in Ubuntu | Tweak Tag